WIRED LEADER


WHAT IS A WIRED LEADER?
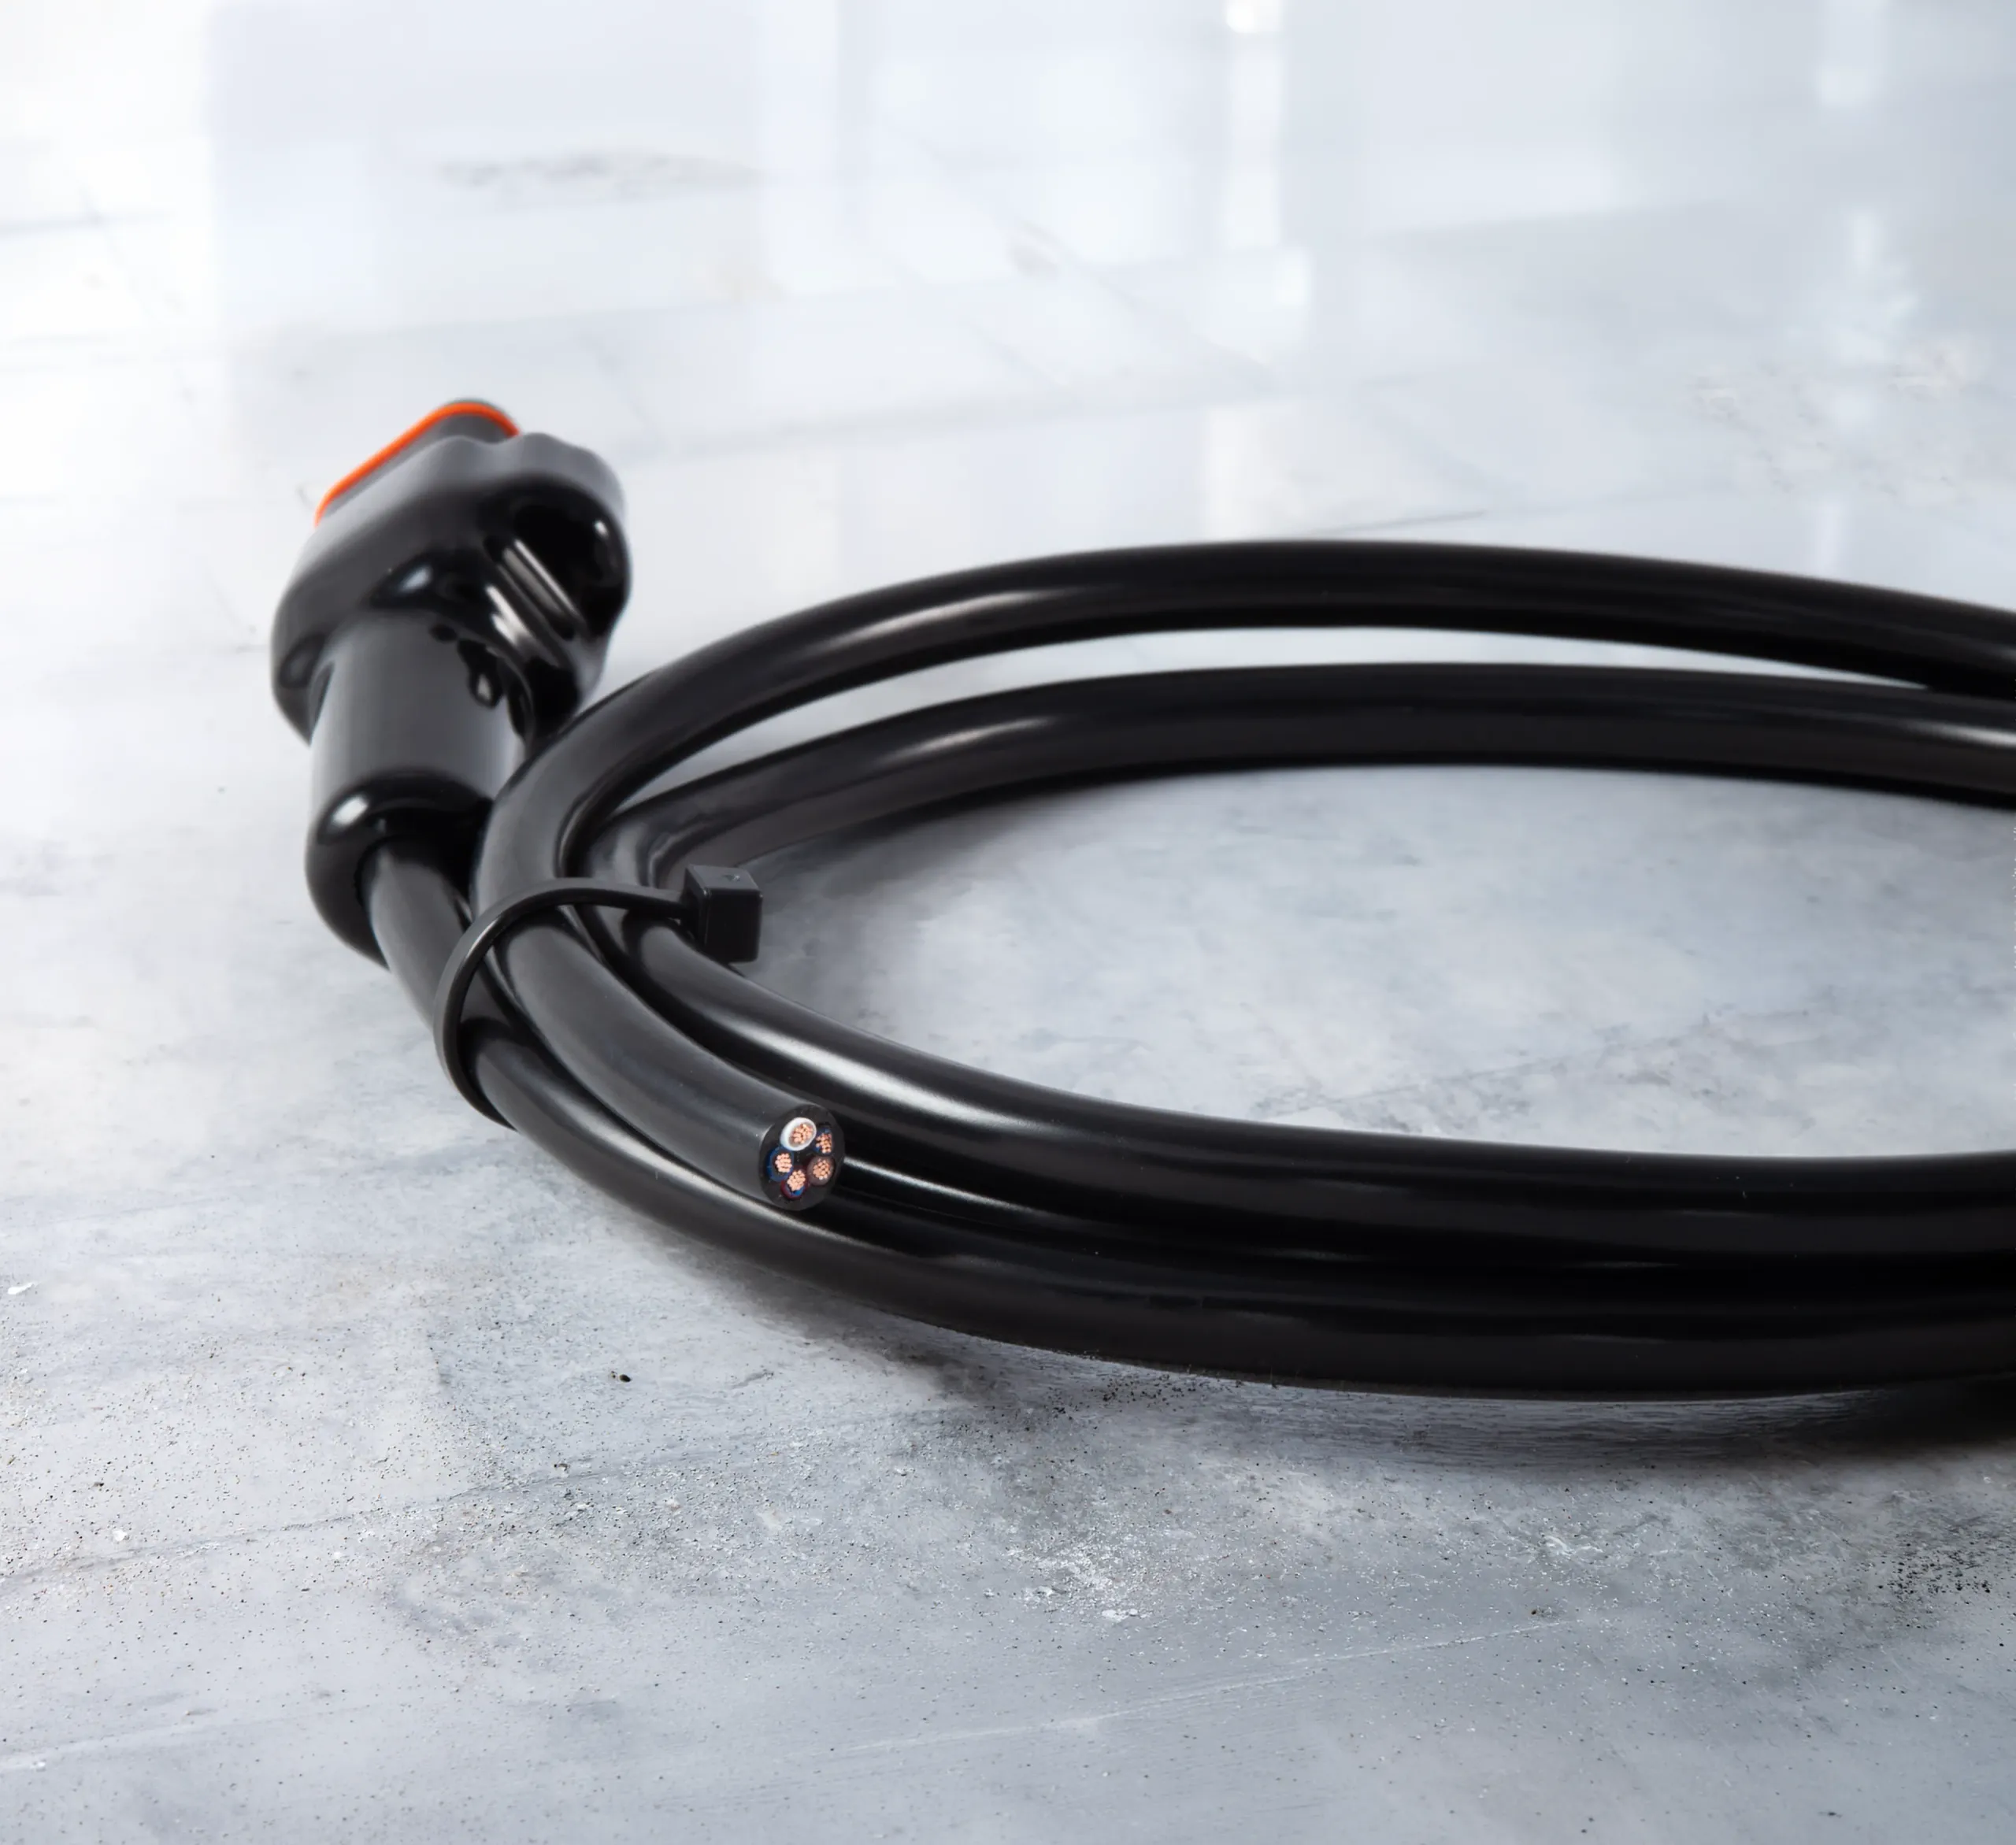
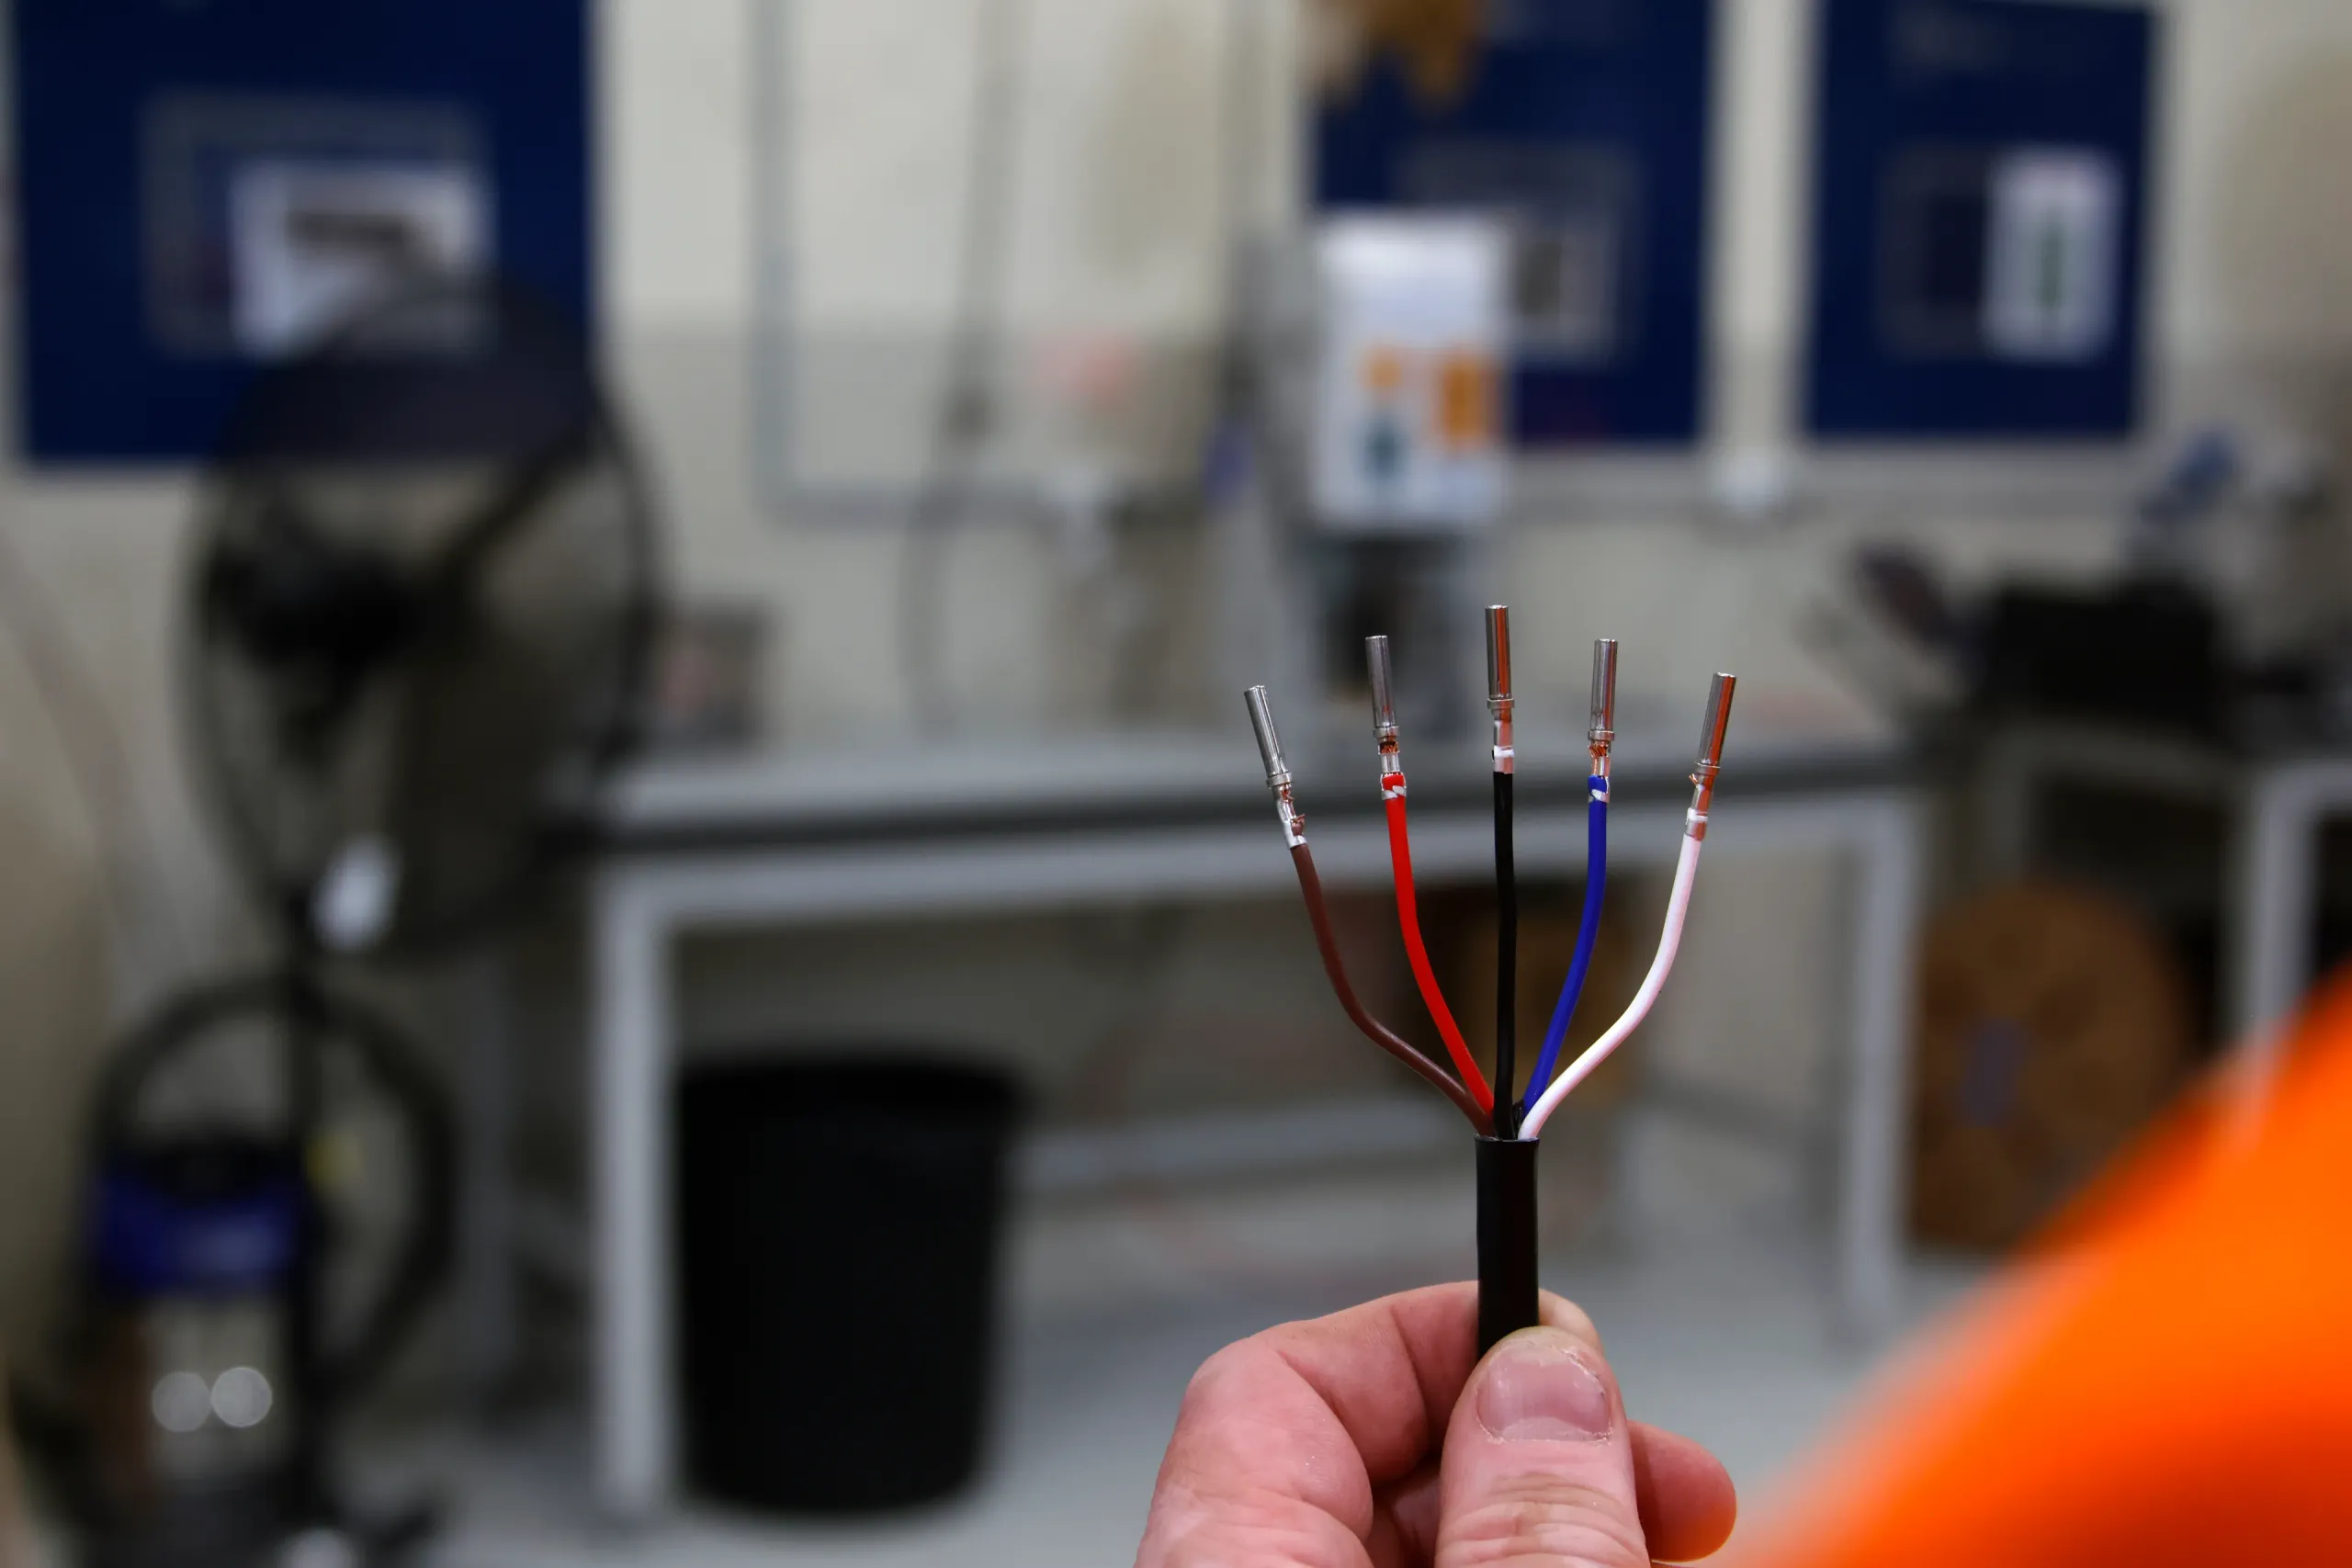
The Wired Leader is a 1.5 m, five-core wiring harness with a pre-wired Deutsch connector at one end and colour-coded flying leads at the other. It provides a hardwired alternative to a plug & play adaptor by connecting the brake controller directly to the existing wiring loom. The connector at the brake controller end is sealed and IP67 rated.
For trailer installations, the Wired Leader connects an EB2 or ELBC2000-PS to the trailer's wiring loom and can be routed internally through the chassis to minimise exposed cabling. For vehicle installations, it connects a VM1 to the vehicle's existing trailer socket. The five colour-coded wires correspond with the Elecbrakes technical manuals for straightforward installation.
A Wired Leader is included with every VM1. Additional leaders can be purchased as a spare or replacement, or for setting up another vehicle. For the EB2 and ELBC2000-PS, the Wired Leader is sold separately and is ideal for a permanent, hardwired installation.
Ready to buy?
From A$18
FIND A STOCKISTKEY FEATURES
Discover the benefits of choosing the Wired Leader for a permanent, hardwired brake controller installation.

One Harness, Two Installs
One Wired Leader supports permanent installations for EB2 and ELBC2000-PS brake controllers on the trailer, or a VM1 on the tow vehicle.

IP67 Waterproof Connector
Designed and manufactured in Australia, with an IP67-rated connector at the brake controller end and a two-year warranty.

1.5m of Routing Flexibility
Provides the length needed for flexible positioning and tidy cable routing. For trailer installations, it can be routed internally through the chassis to minimise exposed cabling.

Auxiliary Power Ready
The five-core harness supports connection to a dedicated 12 V or 24 V auxiliary power source when required for your brake controller installation.

Colour-Coded Wiring
The colour-coded wires correspond with the Elecbrakes technical manuals, making each connection easier to identify during installation.

Permanent Hardwired Installation
Connects directly to the existing wiring loom, making it ideal for clean, custom installations without an additional plug & play adaptor.
WIRING GUIDE
Five wires, colour coded the same way in every Elecbrakes technical manual. Match them to the table, then work through the steps.
| Wire | Trailer-SideEB2 / ELBC2000-PS | Vehicle-SideVM1 |
|---|---|---|
| Black | Auxiliary DC voltage supply | DC voltage supply |
| Red | Brake light circuit | Brake light voltage supply |
| Brown | Tail light circuit | Not used |
| White | DC negative (earth) | DC negative (earth) |
| Blue | Service brake output | Service brake output |
Pin 5 can be an ignition feed
Where a vehicle puts ignition power on Pin 5, disconnect it from the service brake output. It is the most common hardwire fault we see.
Do not share the light circuits
Auxiliary power wants its own fused supply, ideally an ignition triggered fuse block. Off the light circuits it defeats the point.
Professional installation recommended
Hardwiring means cutting into an existing loom. If you are not confident identifying circuits, have an auto electrician fit it.
INSTALLATION STEPS
- 1
Pick your side
On a trailer the leader joins the trailer's loom for an EB2 or ELBC2000-PS. On a tow vehicle it joins the existing trailer socket for a VM1.
- 2
Route the leader
1.5m gives you room to run it internally through the trailer chassis if you want it out of sight. Keep it clear of heat and anything that moves.
- 3
Match the colours
Work through the table above alongside the EB2 or VM1 technical manual, and keep the service brake circuit separate from Pin 5.
- 4
Feed it properly
Auxiliary power wants a 25A rated circuit: Pin 2 on a 7-pin flat, or Pin 8 or Pin 9 on a 12-pin. Fit a 20A inline fuse at the battery end.
- 5
Check before you tow
Confirm at least 10V on every relevant circuit, then run a brake test in the Elecbrakes app before the first trip.
LEADER SPECS
Core fitment and electrical specs for the Wired Leader.
| Spec.Specification | Details |
|---|---|
| Part code | TWL |
| Length | 1.5m |
| Connector | Deutsch plug, IP67 rated |
| Conductors | 5 core (black, red, brown, white, blue) |
| Termination | Bare flying leads |
| Compatibility | Trailer-side EB2, ELBC2000-PS Vehicle-side VM1 |
| Minimum input voltage | 10V |
| Recommended aux circuit | 25A rated. 7-pin: Pin 2. 12-pin: Pin 8 or Pin 9. |
| Recommended inline fuse | 20A |
| Supplied with VM1 | Yes. Sold separately for EB2 and ELBC2000-PS. |
| Warranty | 2 Years |
RESOURCES & SUPPORT
The Wired Leader is documented inside the EB2 and VM1 manuals. These are the references worth having open while you wire it in.
EB2 Technical Manual
Trailer-side hardwire install, plus the wired leader wiring diagram in Appendix 2B.
EB2 Wiring Diagram
7-pin and 12-pin trailer plug references for a trailer-mounted install.
VM1 Technical Manual
Vehicle-side install using the 1.5m leader supplied in the VM1 box.
VM1 Wiring Diagram
Standard vehicle socket wiring reference for a vehicle-mounted install.
INSTALL VIDEOS
Watch step-by-step install and setup videos in our video library for a more visual guide to wiring your brake controller in.
HELP CENTRE
Get quick answers on install advice, troubleshooting, app connectivity, and product support from the Elecbrakes Help Centre.
FREQUENTLY ASKED QUESTIONS
No. A 1.5 m Wired Leader is included with every VM1 and is used during installation.
You only need to purchase another Wired Leader if you want a spare, need a replacement or are setting up a second tow vehicle. For EB2 and ELBC2000-PS installations, the Wired Leader is sold separately.
Yes. A Wired Leader provides a permanent alternative to a plug-and-play adaptor by connecting directly to the trailer's wiring rather than sitting between the existing trailer plug and vehicle socket.
Match the wire colours to the trailer plug using the wiring guide above, and refer to the pin numbers in the EB2 Technical Manual. Inside the trailer plug that connects to the tow vehicle socket, the service brake wire (blue) must be joined to create a closed circuit between the brake controller and the brake magnets.
The leader carries five colour coded wires:
- Black: auxiliary DC voltage supply
- Red: brake light circuit
- Brown: tail light circuit (not used on a VM1)
- White: DC negative, or earth
- Blue: service brake output
The wiring guide on this page shows what each one does on a trailer-side and a vehicle-side install. Always check it against the EB2 or VM1 Technical Manual for your setup.
Connect the black wire to a 12V to 24V DC supply, ideally from an ignition triggered fuse block rather than straight off the battery.
On a 7-pin plug or socket the auxiliary circuit runs through Pin 2, suitable for up to 15 amps once the combined lighting circuit draw is taken into account. A 25A rated circuit is recommended. On a 12-pin, use Pin 8 or Pin 9. Always fit a 20A inline fuse when routing an auxiliary supply to the vehicle socket.
An auxiliary feed is what unlocks the controller's full 28A output, so it is worth adding on tri-axle trailers.
Some vehicles use Pin 5 as an ignition power feed rather than a service brake output. When that happens the brake controller sees a signal it should not, and behaves unpredictably.
Disconnect Pin 5 from the service brake output and keep the service brake circuit separate from it. This is the most common fault on a hardwired install, and it is worth checking first.
Only if the existing in-car brake controller is isolated. In most cases, setting its output to 0 will prevent conflicting signals from reaching the trailer brakes.
For an EB2 or ELBC2000-PS installation using a Wired Leader, connect the leader directly to the trailer's service brake circuit and keep this circuit separate from Pin 5 so the in-car controller cannot influence it. For a VM1 installation, remove and safely terminate any existing brake controller wiring connected to Pin 5 at the vehicle socket. This ensures the Elecbrakes controller is the only source of output on Pin 5.
It can be extended, but do it carefully. Every extra metre adds voltage drop, and Elecbrakes brake controllers need a minimum of 10V to operate correctly.
Use cable of at least the same gauge, keep the joins sealed against water, and check for at least 10V at the controller end once the run is finished. If you are unsure, have an auto electrician size the cable for you.
Yes. The Wired Leader is pre-wired with a Deutsch plug that suits both the ELBC2000-PS and the EB2, so the same part covers an older controller and a current one.

FIND A STOCKIST
Find Your Nearest Authorised Dealer
Whether you’re ready to buy or simply exploring your options, our nationwide network of authorised stockists is ready to help.